Adobe Illustrator Tutorials Vector Tips & Tricks Search related topics..

Happy 25th Anniversary Adobe Illustrator ☺. Since 19 March 1987 it was shipped and being in the market, as the first software application for a 5 years old company. Well I just knew that Illustrator is the first software by Adobe.. and it was change the way designers and artist do their jobs. The Vector Application then conquer the industry. Read the story more from adobelife blog.
Here are all the Adobe Illustrator's Splash Screen since the 1st version of the software till now. The woman image is a painting - 'The Birth of Venus' by Sandro Botticelli.


The Birth of Venus (Illustrator must be female) lol..

1987: Adobe Illustrator 1.1

1988: Adobe Illustrator 88

1991: Adobe Illustrator 3

1993: Adobe Illustrator 5.0

1996: Adobe Illustrator 6.0

1997: Adobe Illustrator 7.0

1998: Adobe Illustrator 8.0

2000: Adobe Illustrator 9.0

2002: Adobe Illustrator 10

With new optimized software's engine & the new name, CS (Creative Suite)
2003: Adobe Illustrator CS

2005: Adobe Illustrator CS2

Re-branding looks great
2007: Adobe Illustrator CS3

2008: Adobe Illustrator CS4

extra dimension - perspective included
2010: Adobe Illustrator CS5
what next.. Ai CS6 on the way.. let see ; )


src & img credit:
  • https://www.facebook.com/media/set/?set=a.10150625558263226.394954.64138473225&type=1
  • http://blogs.adobe.com/adobelife/2012/03/21/happy-25th-adobe-illustrator/
A good artworks or visual designs need both combination of Vector & Raster graphic editor. That is the purpose and the differ between Adobe Illustrator & Adobe Photoshop, that many users still don't really understand 'why Adobe creates (and Designers using) both of it. Every time (non designer) asked me about these two graphic design software related and their purpose, I replied; "It's something like, why God creates woman when man can handle this world themselves". (Do we..?)

Illustrator & Photoshop is like male & female (doesn't matter who's male & who's female in this case)☺ Sometimes we need to use Photoshop to completes Illustrator works and vice versa. Same goes to female that completes male, right..♥ Anyway, I'm talking about the 'communication' it should goes between these 2 software 'in action'.

Ok lets say we done doing some (unfinished) artworks with Illustrator and there are some Layers in the Ai files, we need to transfer the job to Photoshop, with all the Layers and Texts editable in Photoshop. Simply Export the files from Illustrator to Photoshop.

File > Export > Photoshop (psd)

Well, I'm sharing this simple Illustrator Tips on how to do it.. please read from the source


via: twitter.com/wegraphics
src & img credit: http://wegraphics.net/blog/tutorials/illustrator-quick-tip-exporting-files-to-photoshop


----------


Here another Tips on working with..

Ps to Ai & Ai to Ps


Read from the source: Illustrator files in Photoshop & Photoshop file in Illustrator


src & img credit: http://creativefan.com/photoshop-illustrator-integration-tips/

Today we showcase some of Typography related in Poster Design by designers mostly by typeface designers and they're called Typographers. Also some topic and infos about Typography and the anatomy. Checkout some of their Typography artworks.


Here are some Free eBooks specifically for Typography you can read and study the use of it in designs and for web.. enjoy..

credit:
http:// flickr.com
http://dailyinspiration.nl/this-weeks-web-design-91
http://designbeep.com/2012/01/10/15-free-and-useful-typography-ebooks


Here are 50 Illustrator Tutorials dated 21 March 2009, it must be Illustrator CS3 tutorials because the collections should be before of the date it was published in Think Design as 50 links to take a look.

Personally Illustrator CS3 is the best choice to be start with if you wanna learn the basic of Adobe Illustrator, simply because Ai CS3 don't have (and you don't need those) some new fancy tools and features such as the bristol brush, perspective tools, etc.. and it will not confusing you with multiple artboards introduced. The best features in Illustrator CS3 for me is the simple but powerful 'Smart Guide' compared to CS4, CS5 (or new coming perhaps) which the new 'Smart Guide' seems too much in 'snap' abilities, and it's not possible to configure it as the previous.

Anyway here are the topics covered in the collections of 50 tutorials:
  1. Basic Shading and Lighting
  2. Tutorial: Transform, Style, Blend
  3. Tutorial: make texture without leaving Illustrator
  4. Some Cool Introduction to Illustrator Videos
  5. Basic Drawing with Adobe Illustrator’s Paths & Pen tool
  6. Creating gradations with Adobe Illustrator’s Gradients & Blends
  7. Basic & Advanced Illustrator Drawing Techniques for Technical Illustrations
  8. Using the Pathfinder and Align tool in Illustrator
  9. Illustrator Pucker and Bloat Effect and more
  10. Tutorial: The Flare Tool
  11. Creating a 3D Gear
  12. Illustrator full spectrum spirograph
  13. Create a Vector RSS Icon with Illustrator
  14. Creating seamless patterns in Illustrator
  15. BMX Illustration
  16. Symmetric Illustration
  17. Soaring Vectors
  18. Creating Road Maps in Adobe Illustrator
  19. Realistic Photo Vector Tutorial
  20. Tropical Transparency Effect
  21. Ornate Lettering Process
  22. How to Design a Font From Start to Finish
  23. Live Color in Illustrator CS3
  24. Create 3D Can of Beans
  25. Blueprint-Style Text in Adobe Illustrator
  26. Logo Design Project Step by Step Walkthrough
  27. How to Create a Trendy Retro Type Treatment
  28. Design a Print-Ready Beer Label in Adobe Illustrator
  29. Tips for Working with the Gradient Mesh Tool In Illustrator
  30. How to Design a Classic Heraldic Figure
  31. 10 Free and Extremely Useful Illustrator Scripts
  32. Creating Sketchy-Style Vectors
  33. Creating A Wood Grain texture
  34. Creating Brushed Metal Texture
  35. How to Create a Stylized Vector Grasshopper
  36. Make 3D Yet Flat Looking Shopping Basket Icons
  37. Make a Torn Vector Desktop Wallpaper with Angled Text
  38. How to Create Colorful Abstract Artwork in Illustrator
  39. Use the power of Illustrator to create cool 3D infographics
  40. Master painting in Illustrator
  41. Adobe Illustrator Tutorial #1 - Adding Texture
  42. Adobe Illustrator Tutorial - Cutaway Technical Illustration
  43. Creating Vector Hair
  44. Create an envelpe icon with a satin feel
  45. How to Create a Vector Safari Compass in Illustrator
  46. Create camouflage patterns
  47. Create a Themed Repeating Pattern in Illustrator
  48. Creating geometric patterns in Illustrator
  49. Illustrator: The Tilde Trick
  50. From Sketch to Vector Illustration
see all the collections via Think Design

don't have the player..? tryout the Illustrator CS5


img credit: Think Design


An Illustrator script named Organize was created by demand of a user to designer and scripter, John Wundes. He is a scripts writer for Adobe Illustrator as in his website.

Well this Organize script purpose is to organize (of course) Arrangements by size:
  • small to large
  • large to small
  • vertical axis
  • horizontal axis
  • left ↔ right
  • right ↔ left
  • random

More info & download in http://js4ai.blogspot.com/2012/02/organize.html.
Make sure to saved it in C:\Program Files\Adobe\Illustrator CS\Presets\Scripts or your default illustrator Scripts' folder.
I've download it and will give it a try and will give my personal feedback perhaps ; )
You can find all of his Adobe Illustrator Script's listing in his scripts archives.
About Adobe Illustrator

Illustrator is a vector drawing program. It is often used to draw illustrations, cartoons, diagrams, charts and logos. Unlike bitmap images that stores information in a grid of dots (called pixels), Illustrator uses mathematical equations to draw out the shapes. This makes vector graphics scalable without the loss of resolution.

Advantages of vector graphics

Scalable without resolution loss
Lines are crisp and sharp at any sizes
Print at high resolution
Smaller file size Good for drawing illustrations


Disadvantages of vector graphics

Drawings tend to look flat and cartoon
Hard to produce photo realistic drawings

Common Uses for Illustrator

1. Designing Logos


2. Drawing Maps


3. Drawing Illustrations
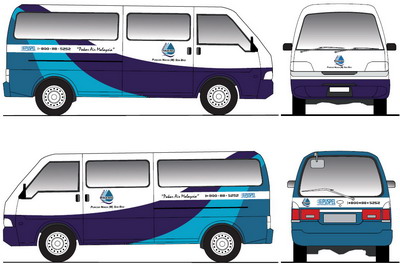


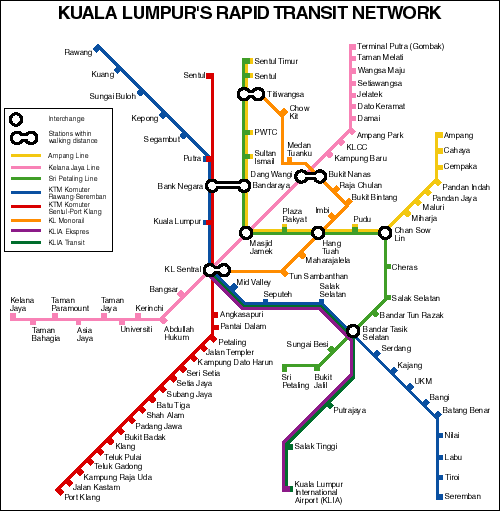
These are some samples that you can imagine what are the purpose of Adobe Illustrator for. Its not just that, in fact there are alot of other task that require this software to works with i.e Adobe Photoshop, InDesign, Flash, etc. The artworks created by this software can be saved to PSD format also can be converted (File > Export) to any image format you prefer.

Note :

The graphics created with Adobe Illustrator are called vector image.
To share the artworks (these vector images), with others who don't have the software, can be save to PDF format and other people can preview with Adobe Reader (or any PDF reader).

Next we will getting start to use.
Illustrator is a vector drawing program. It is often used to draw illustrations, cartoons, diagrams, charts and logos. Unlike bitmap images that stores information in a grid of dots, Illustrator uses mathematical equations to draw out the shapes. This makes vector graphics scalable without the loss of resolution.

Advantages of vector graphics
  • Scalable without resolution loss
  • Lines are crisp and sharp at any sizes
  • Print at high resolution
  • Smaller file size
  • Good for drawing illustrations
Disadvantages of vector graphics
  • Drawings tend to look flat and cartoon
  • Hard to produce photo realistic drawings
Common Uses for Illustrator

1. Designing Logos


2. Drawing Maps


3. Drawing Illustrations


4. Artworks & Designs


Next step we'll go through the interface of Adobe Illustrator CS3. Hopefully you're already understand the purpose of Adobe Illustrator and the different compared to Adobe Photoshop.
As a new user for Adobe Illustrator, you might be wondering how to setting up the layout for your specific jobs. So here I'll show how to set the layout for A4 size paper with 3 panels & 2 folds Pamphlet Design. Some user hardly calculate the length of the paper size, 297mm divide by 3 to get the equals size. Well follow this steps..

1. Create New document and choose A4 paper size with landscape orientation. (You can set stroke's color or simply no color)

2. Activate the smart guides - View > Smart Guides (Ctrl+U)

Click the images to see full size

3. Move your mouse to one of the corner of the A4 size artboard (e.g. top left). Automatically the smart guides will show the intersect (in blue).

Click the images to see full size

4. Click at the 'intersect point' hold and drag your mouse until it touch the bottom of your artboard, and smart guides will show the page (in blue), release mouse.

Click the images to see full size

5. Now you have 1 panel box, next steps just Copy this box and simply Paste in Front.


6. Ready to move the second panel box using Group Selection Tools to move from 1 anchor point to another anchor point.


7. Remember the second panel box is ontop of the first panel box (because you paste in front), just use this Group Selection Tools (white arrow with plus) and click from top left anchor point to top right anchor point.


8. Smart Guides made it easy & accurate touch.


9. Repeat the steps 5 - 8, (Copy the second box & Paste in Front to get the third panel box). Then move the third panel box, anchor to anchor.


10. Select all the 3 panels and use the Free Transform Tool (keyboard E).


11. Ready to transform all the panels at once. Click the middle point of the right side, (your mouse will change to left & right arrow).


12. ...and drag it until it touched the artboard, (smart guides will show 'page').


13. Now your 3 panels are equally divided into 1 sheet of A4 size artboard (paper).


Well, you're ready to do your design job. But I suggest you to rename the current layer with a name such as background or layer 0 and create another layer to works on.

Before you proceed with your design job, I recommends you to save this document as your A4 size 3 panels 2 folds template.. easier for next job.
author
vectorism
designer, illustrator, founder of vectorise.net