Adobe Illustrator Tutorials Vector Tips & Tricks Search related topics..

Showing posts with label Shapes. Show all posts


This simple tutorial we manage to capture on how to create round text for one of our clients. Sorry for the silent video :D


Watch it in HD quality to follow step by step.. feel free to ask anything related to the tutorial title in the youtube comments or in the comment box below. Remember to subscribe the youtube channel too.. enjoy..


Pathfinder is another important tools in Illustrator especially when we need to create vector logo or illustrations when Pen Tool not really helps. Adobe Illustrator Pathfinder panel consists of 10 tools to manipulate vector objects. To using it, there must be at least 2 objects (or more) selected and overlapped between them to be manipulated with Pathfinder tool.

Open pathfinder panel, Window > Pathfinder (Shift+Ctrl+F9).

Pathfinder Panel

Experimenting Shape Modes & Pathfinders

There are 2 categories in the Pathfinder panel, the Shape Modes and the Pathfinder, we will explain
these 2 different categories later, for not making beginner confused. As beginner, just consider all the
tools are Pathfinder.

1. Draw 2 objects, as shown below, we use basic shapes - a green square at the Back (bottom), and a
red circle at the Front (on top). Or any object shapes you like, just make sure they’re overlapped.
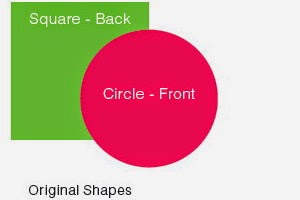


2. Select the objects, and do with all the Pathfinder tools to understand how the effects resulted.

Shape Modes


ORIGINAL SHAPES PATHFINDERS TOOLS RESULTS

Unite merges both selected objects following the top object.


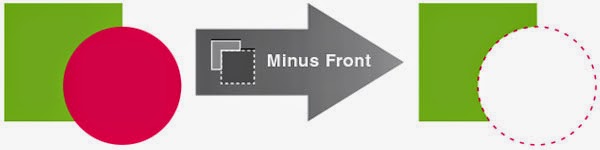
Minus Front removes the front (top) object.


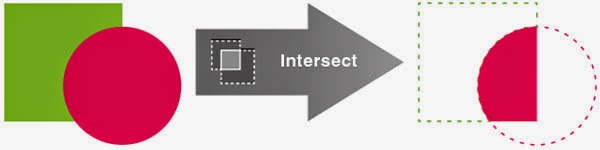
Intersect removes other portions and remain the intersect (overlapped) portions.


Exclude removes overlapped portions and remain the other portions. (contra to Intersect)

Note:
Shape Modes - use these 4 tools with Alt+click, where you have the option to Expand it to permanent effect or No Expand (temporary effect):

Pathfinder


ORIGINAL SHAPES PATHFINDERS TOOLS RESULTS

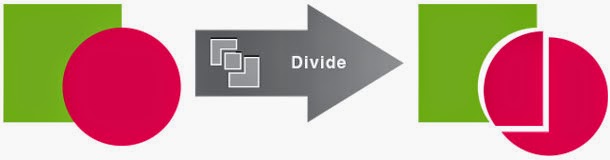
Divide breaks the all the overlapped selected shapes into separated pieces.


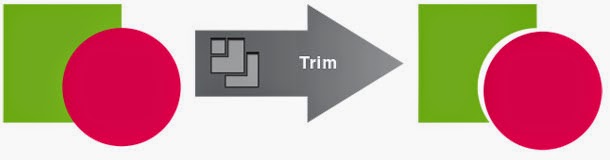
Trim breaks & removes the overlapped portions underneath of the top shape.


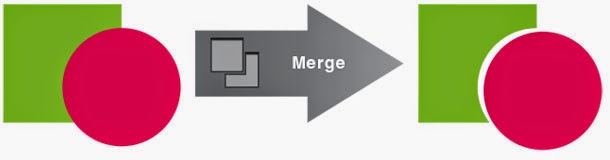
Merge for different color shapes will be similar as Trim effect.


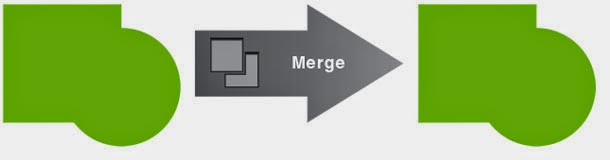
Merge for similar color shapes will be similar as Unite effect, (same color will merge as 1 single shape).


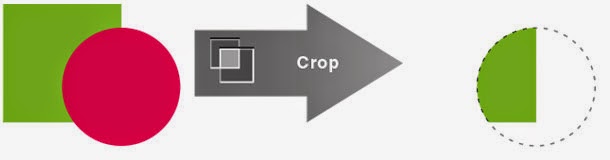
Crop will make the top shape as the masking for any shapes below it,and will removes any portion outside it.


Outline breaks & converts all the shapes into separated strokes.


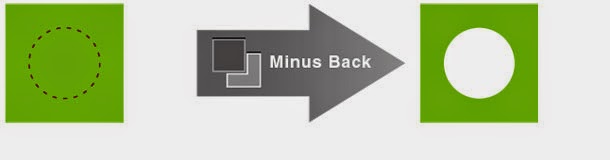
Minus Back remove shapes below (of the top shape) and remove the overlapped portions.


Another example of Minus Back, a smaller circle placed under this square shape..
..and the results, Minus Back removes the overlapped shapes underneath, a hole of circle.


So these are the basic of Pathfinder that we can apply for in creating artworks. Mastering these tools really helps in making illustration or vector works simpler and faster, no much Pen Tool needed. You will appreciate it if you got it..


As you know Adobe Illustrator provides Star shape tool to create star object, but the problem is the default Star shape looks fat. You need just a simple normal or perfect star. Then here I show you the simple way to draw perfect Star.


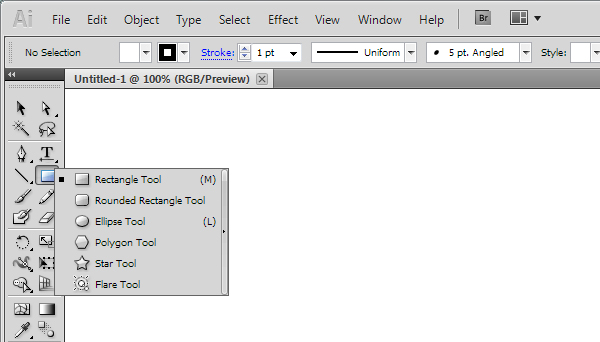
In your Adobe Illustrator artboard, go to the Toolbox and hold the Rectangle Tool, a list of shape tools will expand out for you to pick and click on the Star Tool.


Now the Star Tool activated and you're ready to draw Stars, but before that, its good to know that there're 2 ways to create Star:

1. To draw a Star with custom Size & Points:

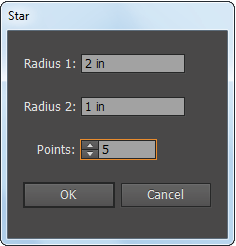
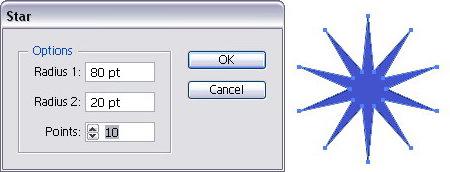
Click once on artboard, a dialog box will appear with 2 Radius settings and a Points value:


  • Radius 1 = outer corner (measured from center)
     
  • Radius 2 = inner corner
     
  • Set the Points value to determine how many corner for the Star

A Star will be created according to your value settings.

2. To draw a Star with normal click & drag:

This is the common way designers created Stars in Illustrator, but pay attention on how to get the perfect Stars.

  • Click & drag to draw random orientation Star ↓


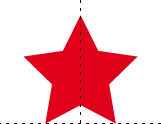
  • Press Shift while click & drag to draw ‘perfect standing’ Star ↓


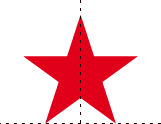
  • Press Alt while click & drag to draw ‘perfect’ Star shape ↓


  • Press Shift+Alt while click & drag to draw ‘perfect standing’ of a ‘perfect’ Star shape ↓


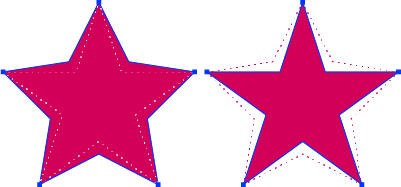
  • Press Ctrl while click & drag to draw a changing shapes of Star,
    (it change shape while you drags it) ↓


So now you know how to create Stars for your design works..


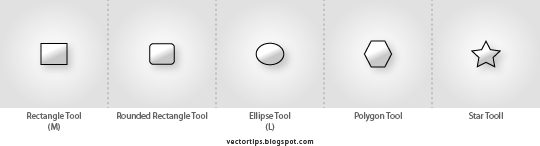
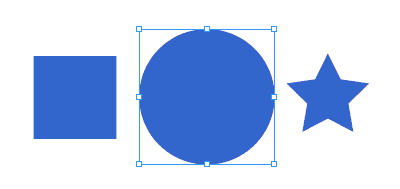
There are some basic shapes available in the Toolbox as shown in the image below. They call it Shape Tools. When you go to the Toolbox and hold the Rectangle Tool, a list of shape tools will expand out for you to pick. We will start with the default Rectangle Tool (the shortcut is M).


The name of the tools show the functions, so try do create some shapes; rectangle, ellipse,etc.

Before we go more on Shape Tools, we need to understand the basic of Vector Graphic that render the 'Shape' - the Fill & Stroke


Understanding Fill & Stroke

  • Fill - color inside the compound shape
  • Stroke - color of the outline shape
Draw a Rectangle as shown below. By default, it has a white fill and black stroke. (Stroke is the border of the shape)

Fill & Stroke color tool


As the image shown here, the Stroke Tool indicated by the square hollowed box (shown here with black color). Fill Tool indicated by solid square (shown here with white color).

As the image shown here, the Stroke is active, as it is on top of the Fill. To change the Fill color, click the Fill Tool first, to make it on top (active).
And the small doublehead arrow is to swap the colors between Fill & Stroke.


Changing Fill Color

Let’s start changing the Fill color for the rectangle. Double click the Fill from the Tool Palette. It will pop up the Color Picker. Drag the (small triangle) slider to blue and select a deep blue color, click Ok.


Removing Stroke

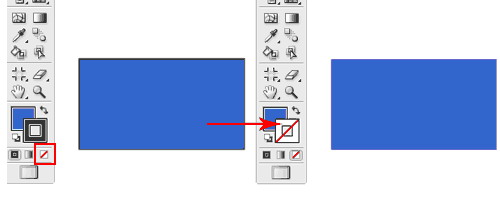
Click the Stroke in the Tool Palette once to swap it above Fill. Click the None icon boxed up in red to set the Stroke to None. The black stroke will disappear.


Now after we understand the basic element of vector graphic, that Shapes are rendered using Fill & Stroke.. now lets try more on Shape Tools ↓


Constrain Proportions

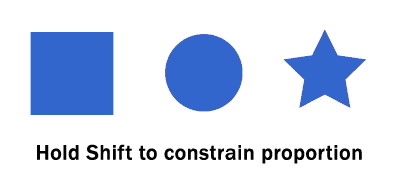
To draw a perfect square, we will select the Rectangle Tool. Hold Shift (keyboard) & drag (mouse) to draw a square. Same for the circle, we will select the Ellipse Tool and hold Shift & drag your mouse to get perfect circle.


Resizing Shapes


To resize shapes, select the shape using the Selection Tool and a bounding box will appear. Drag the corner anchor point to resize it. To constrain to proportion while resizing, hold Shift as you resize. Also hold Alt/Option if your want to resize from the same position.


Rotating Shapes

Select the shape with the Selection Tool and a bounding box will appear. Move your cursor near the anchor corner and a rotation icon will icon, click and turn it to rotate the square. To snap at 45 degrees increment, hold Shift and turn.


More Options for Shape Tools

Select the Star Tool. Click once on the artboard and an option will pop up. Enter the values as shown and click Ok. It will draw a star burst shape. This method can be used to create more options for star shape.


Conclusion

All of these basic shapes available in Adobe Illustrator are just basic symmetrical objects / shapes which were constructed with Fill & Stroke that shaped the object itself. This Fill & Stroke is the key in creating ‘vector image’ or ‘vector graphic’ (the shape / object itself). We will learn more on Fill & Stroke later as well as creating different objects and more complex shapes. This process will include the using of most popular drawing tools for vector graphic software - the Pen Tool.
author
vectorism
designer, illustrator, founder of vectorise.net