Transform Tools in this tutorials covering the very basic functions as to show how to use the Scale, Rotate, Reflect and Shear. These are most common tools in any vector graphic applications. There are some more advance tools in Transformation but we should explore it later once we master the basic transform.
Scale
To Free Scale objects
Select object, click Free Transform tool
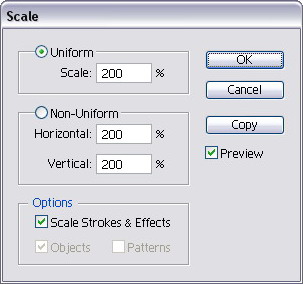
To Scale objects by Value %
Select objects, double click Scale tool
 (dialog box appear), set the % value.
or..
Select objects, (Menu) Object > Transform > Scale (dialog box appear), set % value.
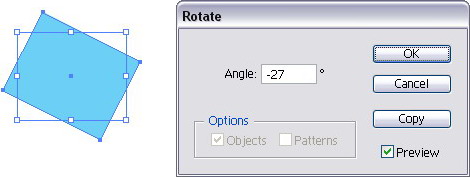
Rotate
To Free Rotate objects
Select object, click Free Transform tool
 Hold Shift to rotate consistently 45° or 90° to the left or right.
To Rotate objects by Value °
Select objects, double click Rotate tool
 (dialog box appear), set the ° value.
or..
Select objects, (Menu) Object > Transform > Rotate (dialog box appear), set the ° value.
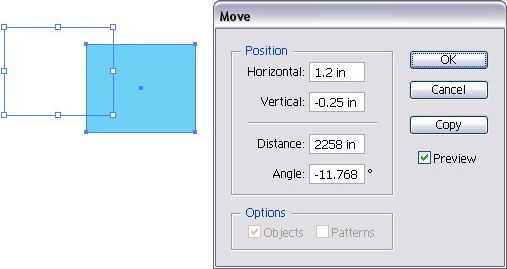
Move & Duplicate
To Move objects by Coordinate Value
We can accurately move an object from one position to another position instead of dragging an object. Very useful when precision does matter.
Select object, double click Selection tool
 (dialog box appear), set Hor. & Ver. value, click OK.
or..
Select objects, (Menu) Object > Transform > Move, set the H&V value, OK.
or..
Select object, press Enter on your keyboard, set H&V value, OK. ← i prefer this method ☺
To Duplicate (Copy) objects by Coordinate Value
Note that there is a Copy button in the dialog box, simply click the Copy button to copy (duplicate) the object and the object will be paste onto the new position as the Horizontal & Vertical value set.
To duplicates more from the second copied objects, simply press keyboard Ctrl + D and repeat the action as many as you want.
Illustrator will record your last action - the Copy process with Hor. & Ver. value, so to repeat the last action use Ctrl + D (or in the Menu > Object > Transform > Transform Again').
Select object, double click Reflect tool (dialog box appear), set the axis value.
or..
Select object, (Menu) Object > Transform > Reflect (dialog box appear), set axis value.
To Free Shear object
Select object, click Shear tool start shear by click & drag outside area of the object, the object will follow mouse direction.
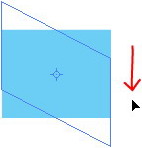 Use your cursor direction where you want the Shear direction to follow.
To Shear object by Angle
Select object, double click Shear tool (dialog box appear), set the Shear Angle.
or..
Select object, (Menu) Object > Transform > Reflect (dialog box appear), set the Shear Angle.
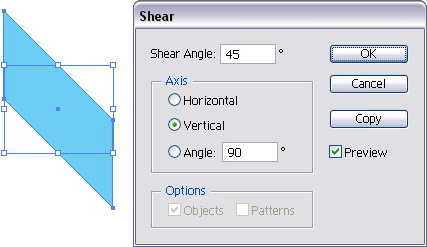
Choose the Axis - Hor., Ver. or by Angle °.
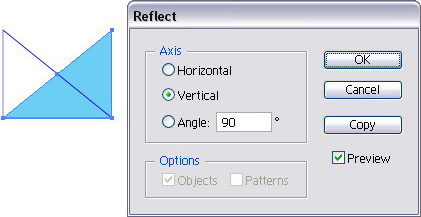
Reflect
Select object, double click Reflect tool
(dialog box appear), set the axis value.or..
Select object, (Menu) Object > Transform > Reflect (dialog box appear), set axis value.
Shear
To Free Shear object
Select object, click Shear tool
start shear by click & drag outside area of the object, the object will follow mouse direction.Use your cursor direction where you want the Shear direction to follow.To Shear object by Angle
Select object, double click Shear tool
(dialog box appear), set the Shear Angle.or..
Select object, (Menu) Object > Transform > Reflect (dialog box appear), set the Shear Angle.
Choose the Axis - Hor., Ver. or by Angle °.