This tutorial, we will look at the Illustrator Work Space, the Tools and Palette that commonly used in working with Illustrator. So first, create a new document, study the environment - the Tools on the left, Palette on the right and Control Panel on the top. But most important are the Tools (left) & Palette (right).
WORKSPACE - TOOLS, PALETTE
Create New Document
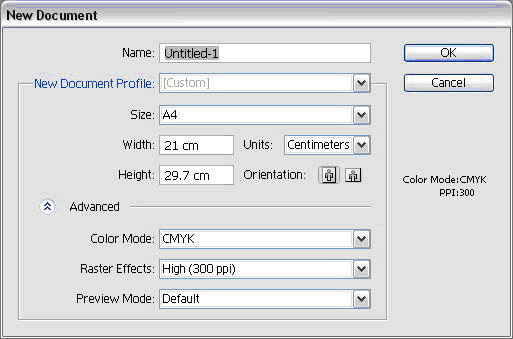
Go to File > New Document to create your first document. Type in a Name for the document and click Advanced to select RGB for Color Mode as we will be working for the screen. Click Ok after that.
Note :
- CMYK Color Mode - for printing job purpose (i.e. brochure, letterhead, name card, etc.)
- RGB Color Mode - for jobs to be displayed on screen (i.e. for website design, video editing)
- Size document (A4 as shown above) will be the artboard size for the new document
- Set the Units – points / inches / mm / cm, etc.
- Orientation either portrait or landscape
- Size, Units & Orientation can be changed at anytime in the middle of your works, go to File > Document Setup
Illustrator Workspace
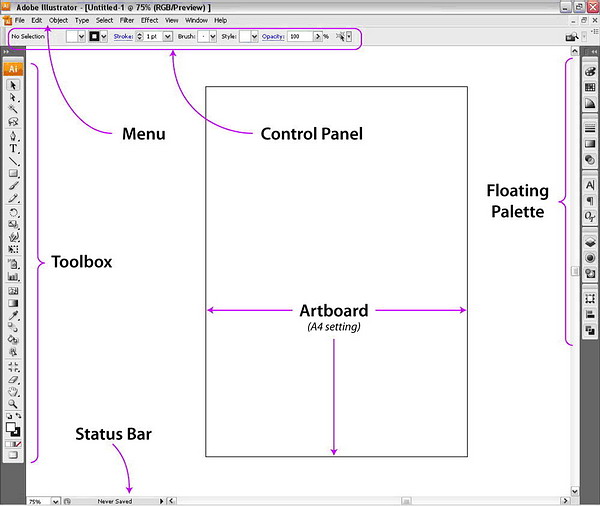
You’re advised to familiarize the Illustrator Workspace, there are 4 main features of the workspace besides the canvas itself.
Toolbox - the tools that we will used
Menu - the standard features for any applications
Control Panel - display the properties of selected tools & artworks
Palette - Holds the properties of the artworks - to modified, change colors, stroke, etc.
Toolbox
This is the handy toolbox which we will use most often. By default, it comes in one single column (collapse) as shown in the screenshot above. To switch it back to the old style 2 columns toolbox, simply click the top left mini arrow >> to toggle it into 2 columns. Some of the tools like Rectangle have more tools hidden. To expand, just click and hold the icon to reveal all the similar tools under that group.
Expandable Tools indicated with small arrow
|
Click & hold the selected tool to expand the extra tools
|
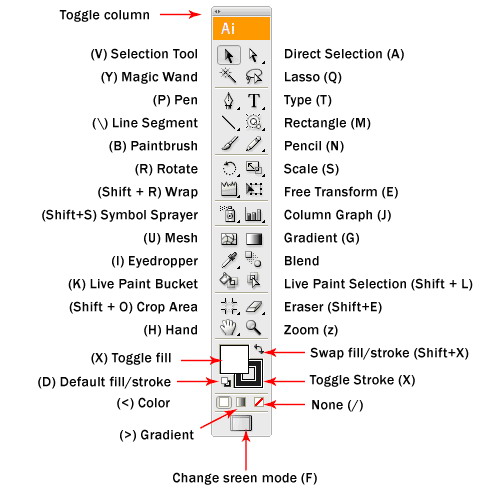
Toolbox with 2 columns view, the functions & the shortcuts indicated in bracket.
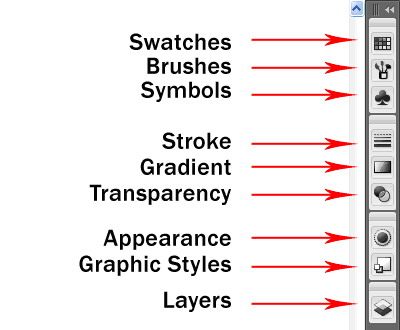
Floating Palette
This is the floating palette which contains properties for our artworks. It is commonly used for changing colors, stroke width, artworks size, effect, etc.


 in toolbox for zoom in & zoom out.
 for zoom in :
 for zoom out :
 or keyboard Ctrl+0
 , click (mouse) & drag document.